
Revise Instantly (Revit)
The name “Revit” was coined as a clever contraction of the phrase “Revise Instantly”. The Architects and Engineers are enjoying this automatic update features for decades except QS. Now, the QS could keep pace with the design changes with QSKing QTO plugin that lives inside Revit.
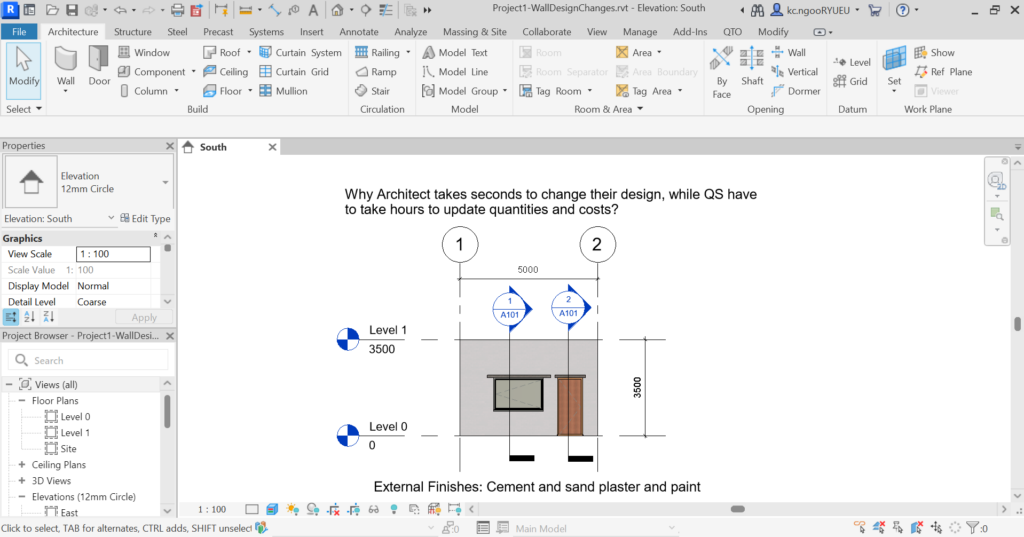
This can easily be demonstrated by a 5000 x 3500 high brick wall with a window and external door comprising 10 measurable items (Fig. 2.1). Instant update of quantities and costs after deletion of the window and external door.
Watch video…
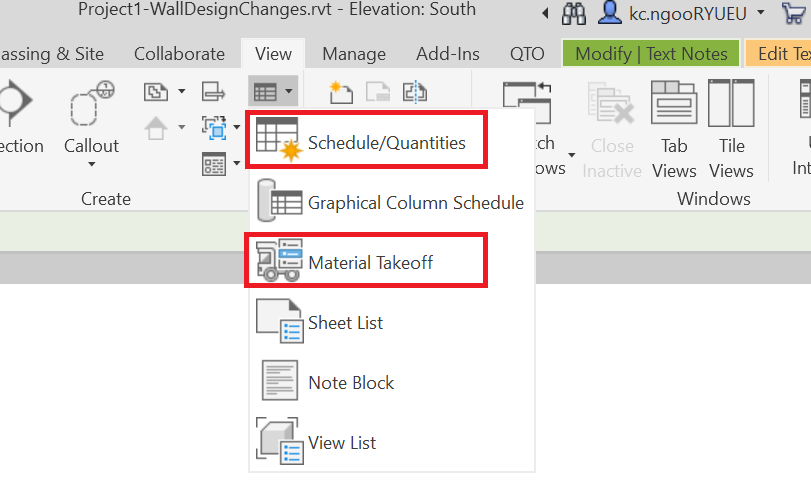
Despite the fact that Revit has a built-in Schedule/Quantities and Material Takeoff (Fig. 2.2), those Schedules are meant for design presentation or analysis purposes, not suitable for the QS. PQS are required to QTO accordance to ANZSMM and for this reason, the plugin has built-in ANZSMM measurement rules to extract all required quantities from the model.
PQS QTO Workflow
This plugin maps the QS QTO workflow (Fig. 2.3).
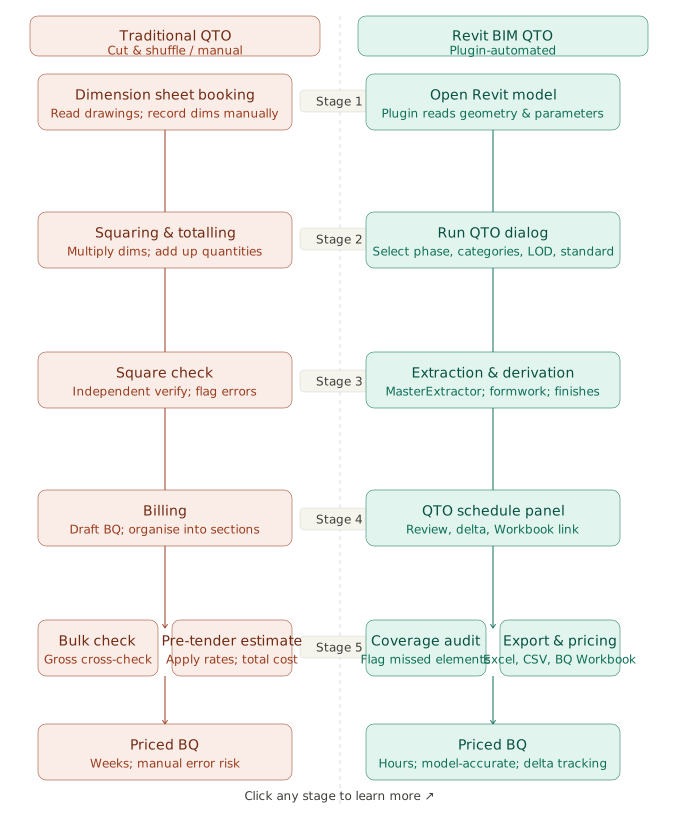
Traditionally, it is a good practice to takeoff quantities according to the construction sequence of the work. This will minimize the omission of items and provides sequential flow of items for traceability. The taker-off is to color or lined through those items being measured. The Team Leader will start billing once the quantities are being squared, totaled and transfer. At the end of measurement, the Team Leader would expect to see a fully colored or lined through of drawings to ensure completeness of measurement. A bulk checks of quantities is the last defense of any gross error in quantities such as multiplication of number of floors or blocks of building, etc.
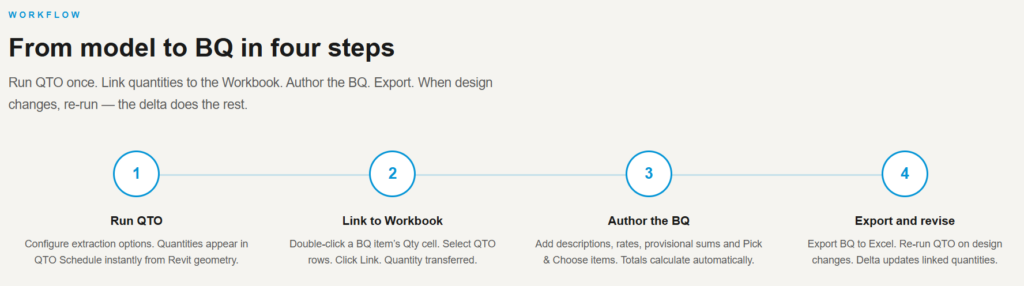
Noted that the present widely used 2D/3D on-screen measurement like CostX, Buildsoft, Bluebeam have simplified all the traditional QS QTO workflow. However, there are two major gaps between on-screen measurement and QSKing QTO. Firstly, on-screen measurement does not provide “instant updates”. Secondly, the 3D read only model requires a “duplication” check on objects. QSKing solves both their shortfalls in four steps (Fig. 2.4) by living in Revit and using the unique native Element ID of each element, no duplication.
It is a known fact that the 2D measurement is the most “comfortable” way of takeoff. This approach provides a sense of control over what been measured. The shortfall of this approach has two folds. One, it does not provide instant update and two, it in cost to design. It depends heavily on QS to report the present cost estimate based on what been design. With QSKing, this process could be reversed to achieve “Design to Cost” as the quantities and costs sync with the model to provide instant numbers.
Buildability Model
It is a known fact that modelers will model the project according to their company standard and for getting development order unless being told by the Client to model to its buildability stage. Regardless of the Level of Details (LOD), all modeler should modeled according to the construction sequence (this matches QS way of measurement and builder way of construction sequence), meaning modeled it element by element, no shortcuts.
The ideal situation doesn’t not always take place in practice. In overcoming this shortfall that “the modeler would model to the way they used to”, QSKing has build-in some “overriding rules” to the model, not amending or affecting the model’s function / features, but to keep all those overruled measurement rules quantities on separate storage that shows up on QTO Schedule for later billing.
QTO Ribbons
QSKing QTO is an add-in to Revit. On click of the QTO top menu, a total of 12 ribbons will appear (Fig. 2.5).

Run QTO
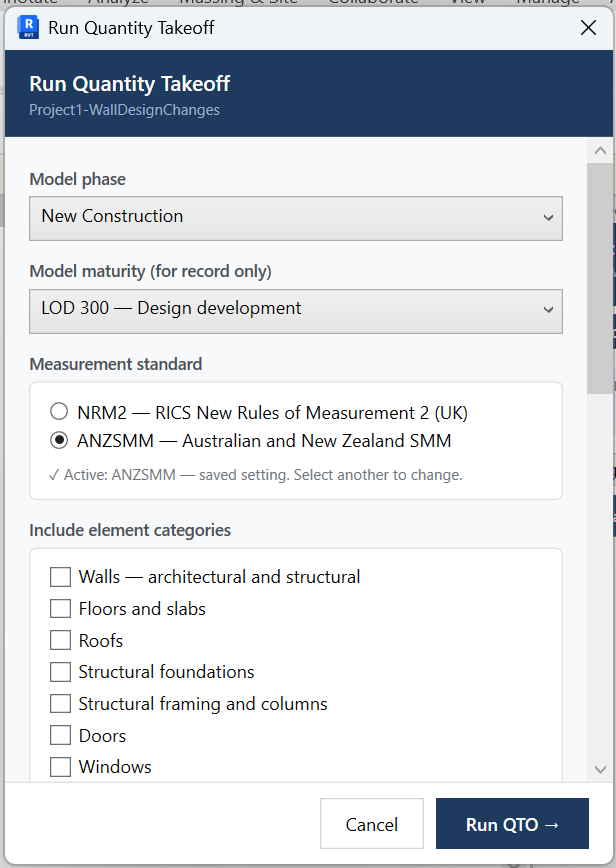
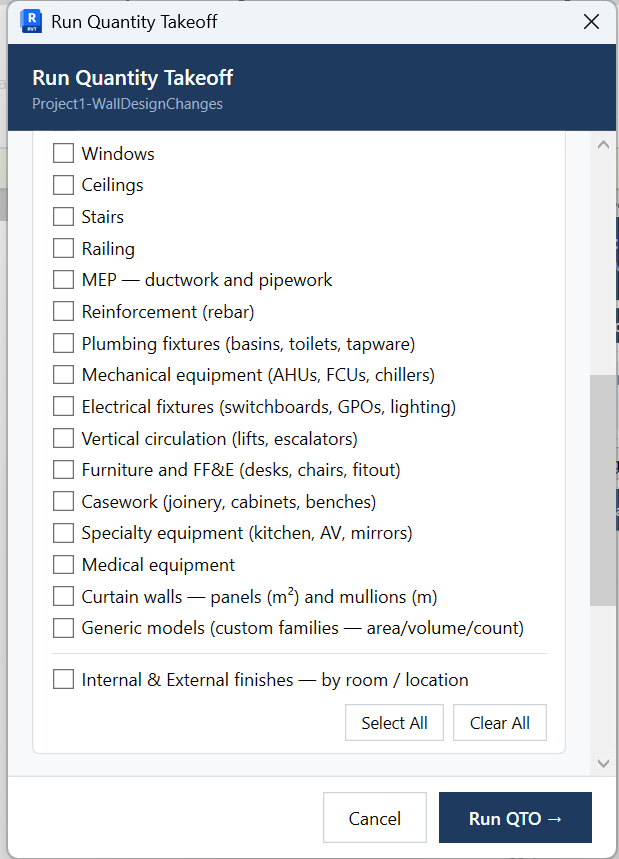
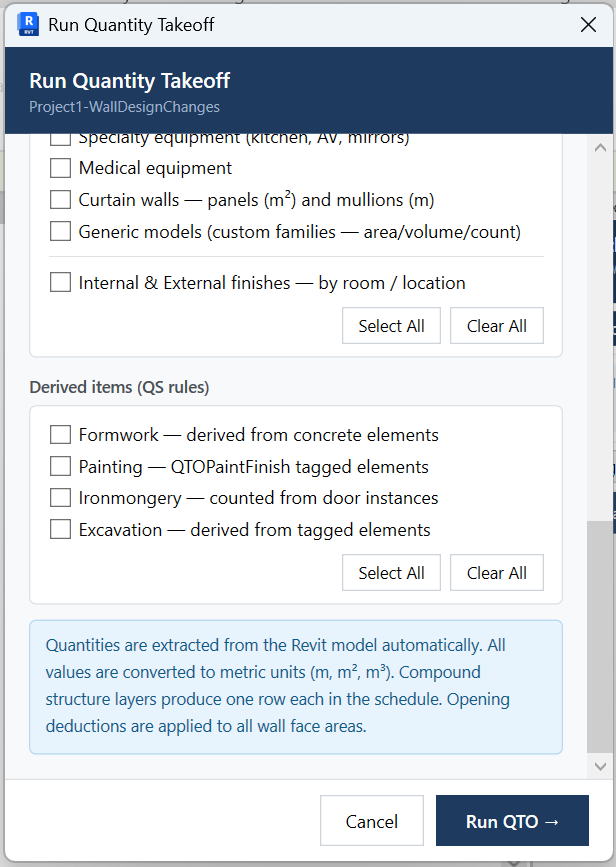
Run QTO command is similar to asking your taker-off to finish off their measurement, provide their Dim sheet, fully squared and totaled for your billing purpose (Fig. 2.6). It only takes a few seconds to extract all quantities according to the pre-defined SMM rules according to Revit system Categories (Architectural, Structural & MEP). You could select to Run QTO on individual Category, group of Categories and All Categories depending on the way you want to extract the quantities for billing.
QTO Panel (Schedule)
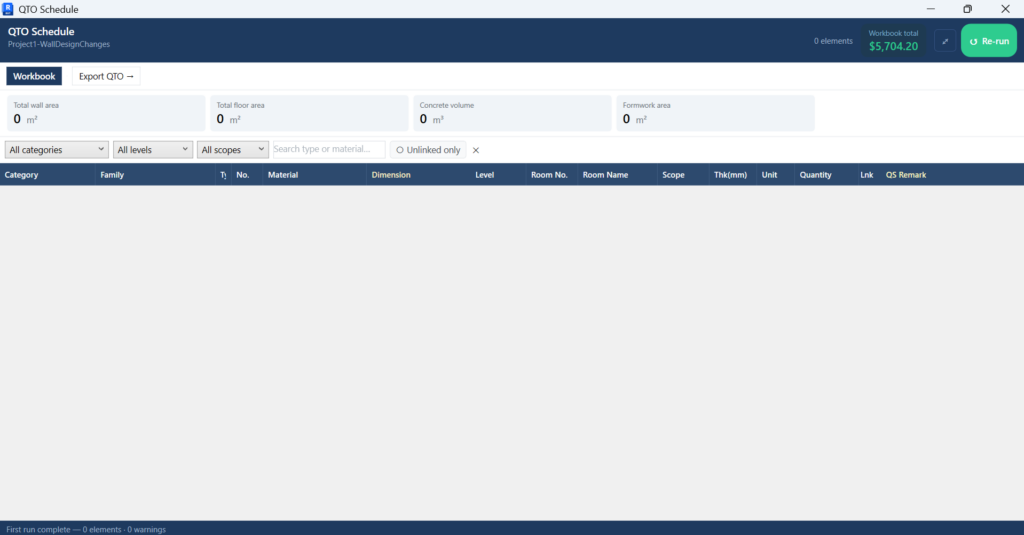
On click of this QTO Panel ribbon, the dockable QTO Schedule (Dim Sheet) will appear on the righthand side of the canvas. QTO Schedule comprising 15 info rich columns to ease linking of quantities during billing process (Fig. 2.7):
Category, Family, Type/material, No., Material, Dimension, Level, Room No., Room Name, Scope, Thickness(mm), Unit, Quantity, Link, QS Remark.
There is a built-in filtering and searching function in the QTO Panel. Filtering helps the PQS to get onto his line items with ease and fast.
Overriding Rules
There are a total of 8 overriding rules, they are Set Sub Type, Set Formwork Type, Set Excavation RL, Set Level, Set External Finish, Pick & Choose, Set External Wall, Set Paint. These overriding rules help to extract the required SMM quantities and arrange in the required manner in QTO Schedule for billing. The universal overriding ribbon is the Pick & Choose. This ribbon is particular useful that you could actually derive quantities in the absence of model, e.g. Prime Cost and Provisional Sums line item, etc. or as if a manual takeoff process, independent from the model.
Model Audit
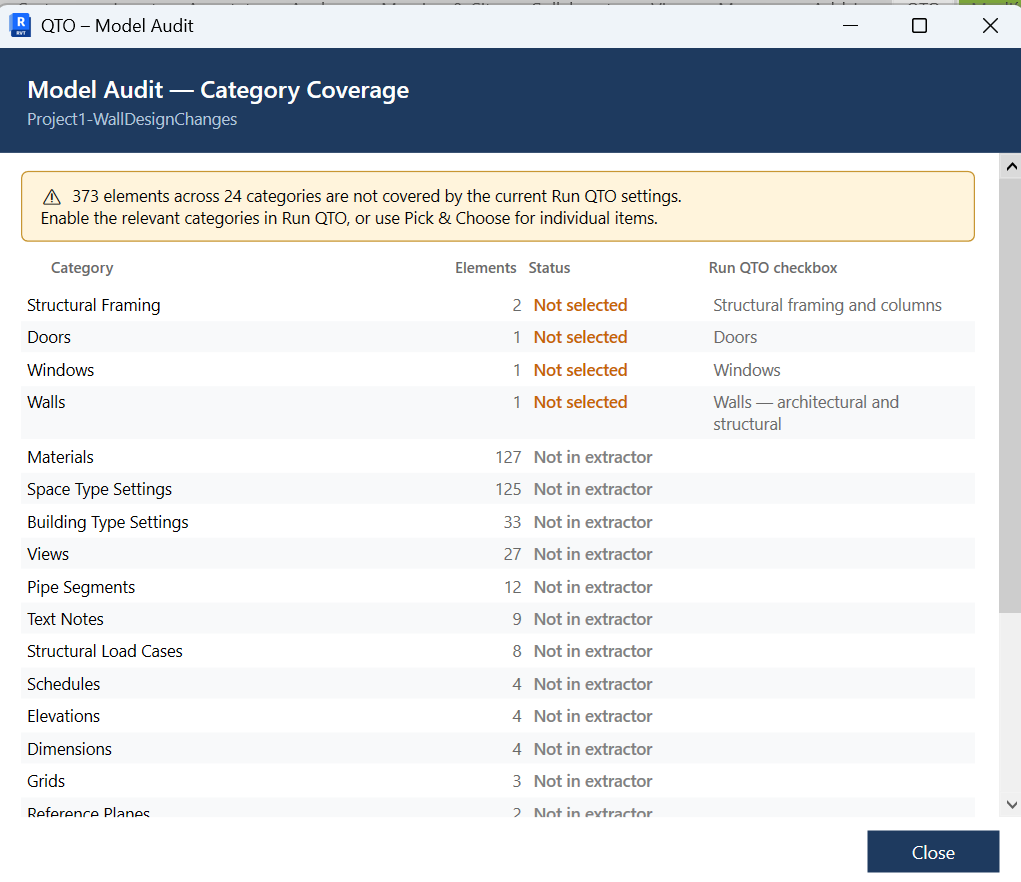
This is the extraction quality checks to ensure that all model’s elements are picked up by the Run QTO command – no missing items (Fig. 2.8).
Export BQ (Workbook)
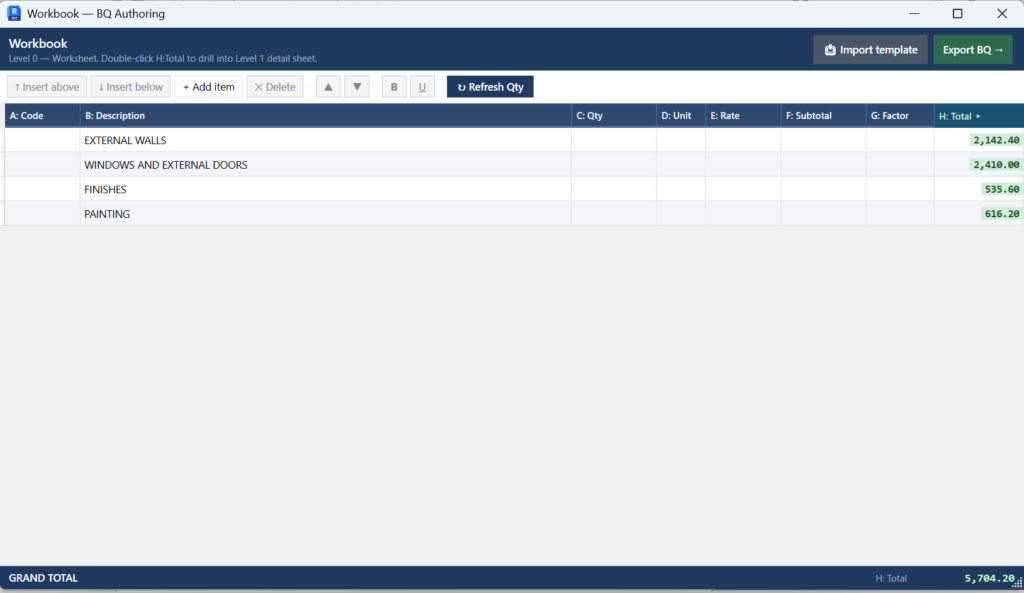
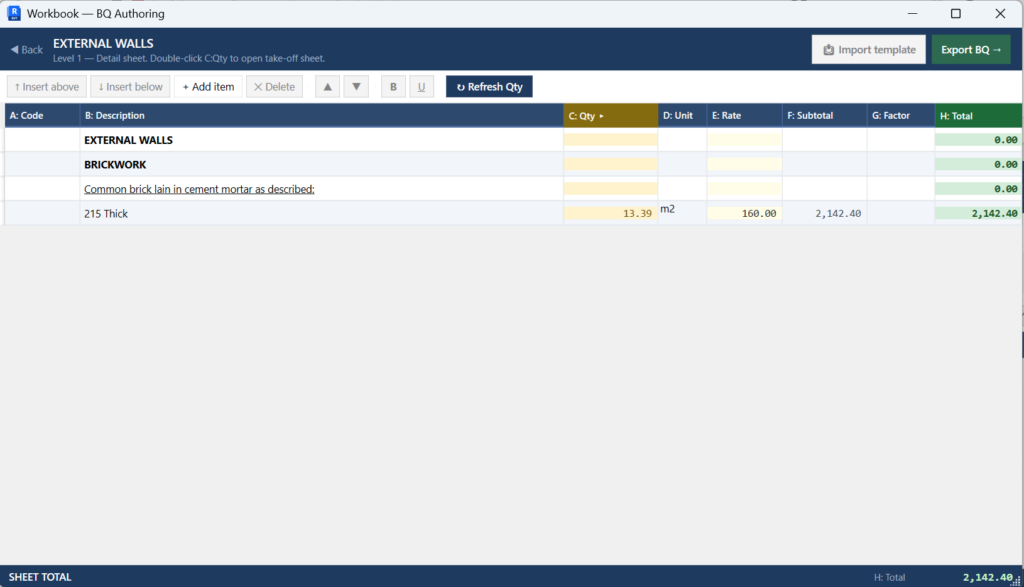
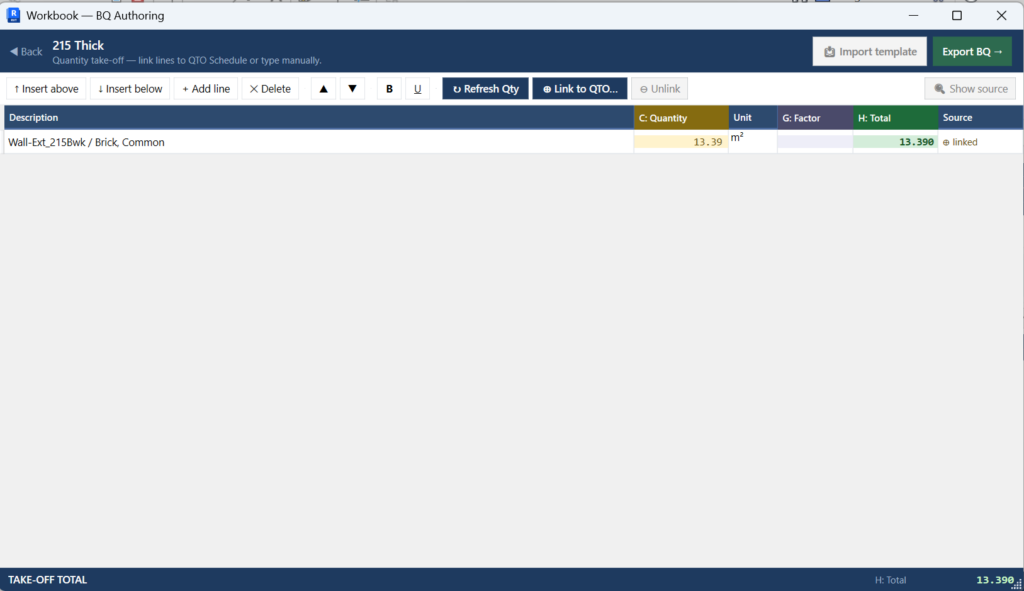
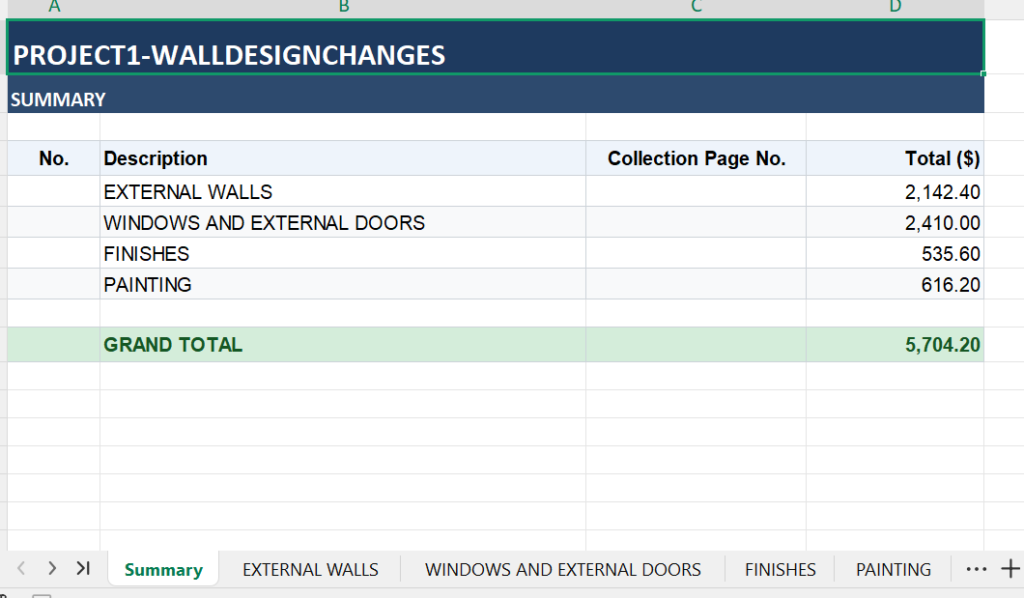
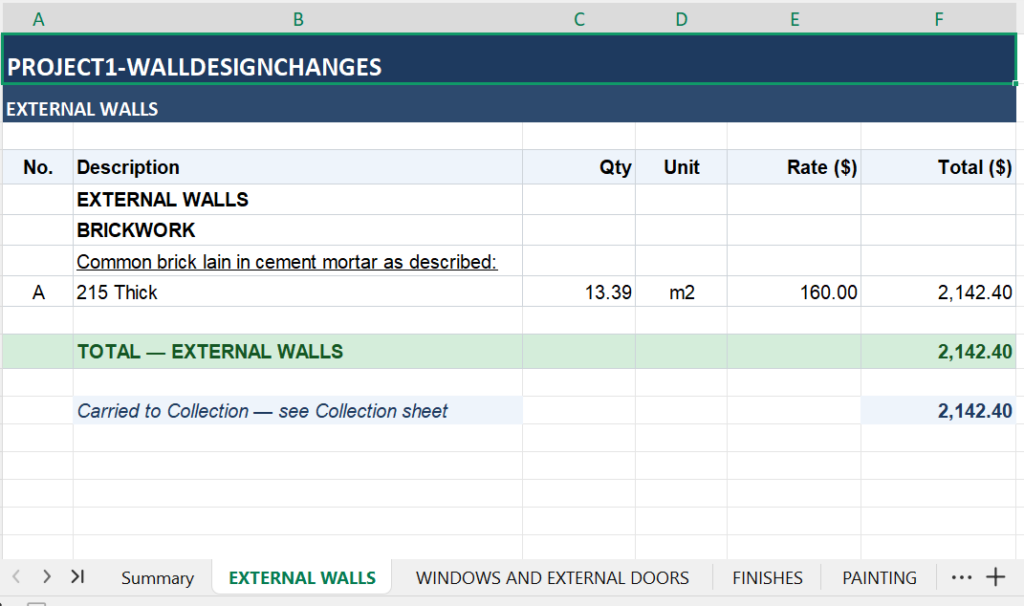
The billing process is being done in a Workbook. The Workbook is the heart of BQ production. It is in drill-down form that comprising three levels, e.g. Level 0 (Summary), Level 1 (Bill Item), Level 3 (Linked / Manual quantities) (Fig. 2.9.1-3). There is an import BQ template function on Description and Unit. This is particular helpful if there exist a company standard description or similar project, this save the team leader time to re-enter similar descriptions.
The BQ is exported in Excel format and at any one time. The default main sheet is the first sheet. All subsequent sheets are the Trade Sections or Work Sections depending on the Team Leader setup in the Workbook. It is What You See Is What You Get (WYSIWYG)” format (Fig. 2.10.1-2)
For more insights of the QTO commands and features, refer to User Manual below.